
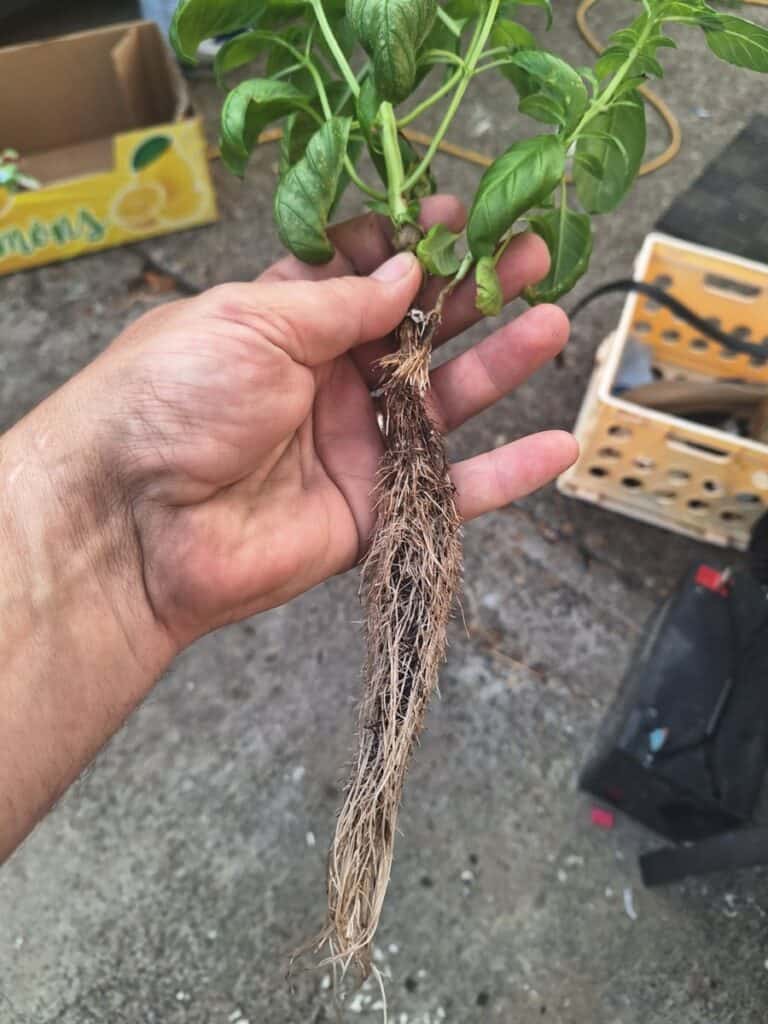
One of the most rewarding plant groups that I’ve grown with soil and hydroponically are herbs. I personally always have several herbs in both soil and the hydroponic garden. Not only do they add beauty and fragrance to your indoor garden, but they also enhance the flavors of your meals. It’s pizza season in at our house, so we’ve got a big basil run going that we’ll be able to harvest throughout the season and even into winter, as long as we maintain and harvest them well. Harvesting hydroponic herbs at the right time and using the proper techniques is essential to maximize their flavor and aroma. In this comprehensive guide, we will explore everything you need to know about harvesting hydroponic herbs, from choosing the right time to harvest to different drying methods. So let’s dive in and discover the secrets of successful herb harvesting in hydroponic systems.
1. Understanding the Best Time to Harvest
Harvesting herbs at the optimal time ensures that you capture their peak flavor and aroma. Although you typically have quite some time to harvest when an herb reaches a mature state, it is crucial to harvest before the herbs start to flower, as this can cause a loss in flavor. Each herb has its own growth cycle and maturity period, so it’s essential to understand the specific requirements of the herbs you are growing. Here are some general guidelines for harvesting hydroponic herbs:
1.1 Timing is Key
The best time to harvest hydroponic herbs is when they have reached their full maturity. This is typically indicated by lush foliage, vibrant color, and strong aroma- just imagine crushing a bright green basil leaf between your fingers, that’s what we wait. Be patient and wait until your herbs have developed to their fullest potential before harvesting.
1.2 Avoid Flowering Stage
Flowering herbs often have a more bitter taste and may have a reduced flavor compared to their pre-flowering stage. To ensure the best flavor and aroma, it’s important to harvest your herbs before they start to flower.
1.3 Regular Harvesting
After many failed attemts at herb growing, one thing I’ve learned is that regular harvesting promotes continuous growth and encourages the production of new leaves. By removing mature leaves or even large portions of the plant, you stimulate the plant to produce new foliage, resulting in a more abundant harvest.
2. Selecting the Right Herbs for Drying
Not all herbs are suitable for drying. Some herbs, like basil and chives, are best enjoyed fresh, (although it is good to have a small stash of these herbs to use through the winter) while others are perfect candidates for drying. When it comes to hydroponic herb drying, it’s recommended to focus on hardier herbs that retain their flavor and aroma after the drying process. Here are some ideal herbs for drying in hydroponic systems:
2.1 Rosemary
Rosemary is a highly aromatic herb that thrives in hydroponic environments. Its woody stems and robust flavor make it an excellent choice for drying. Harvest rosemary stems when they are fully mature and have a strong aroma. I often tie several sprigs of rosemary by the stem and hang them on the wall. It doesn’t take long before the leaves are falling off and the rest are ready to be harvested and stored away.
2.2 Thyme
Thyme is another versatile herb that retains its flavor and aroma when dried. It pairs well with a variety of dishes and is often used in Mediterranean cuisine. Harvest thyme sprigs when the leaves are fully developed and have a fragrant scent.
2.3 Sage
Sage is a perennial herb known for its earthy flavor and velvety texture. It can be harvested throughout its growing season, but for drying purposes, it’s best to harvest sage leaves when they are at their peak flavor and before the plant starts to flower.
2.4 Lavender
Lavender is not only a beautiful flowering herb but also a popular choice for drying. Its calming aroma and delicate flavor make it a favorite for teas, sachets, and culinary creations. Harvest lavender flowers when they are fully open but before they start to wither.
2.5 Basil
Basil is one of my favorite herbs, and I can’t leave it out of anything, although it’s not the most popular choice for drying. Its strong aroma blends well with so many different culinary dishes we regulary prepare in our home. It’s versatile and goes in sauces or in anything that needs some added flavor.
Wonder how long it would take to be able to harvest some basil of your own? Click here to check out this article I wrote about how to quickly get your own basil garden up and running.
3. Techniques for Harvesting Hydroponic Herbs
Now that you understand the importance of timing and herb selection, let’s explore the various techniques for harvesting hydroponic herbs. The methods may vary slightly depending on the herb, but the underlying principles remain the same.
3.1 Cutting Herbs from Your Hydroponic System
To harvest hydroponic herbs, you can cut the stems or leaves directly from your plants. Here’s a step-by-step guide on how to do it:
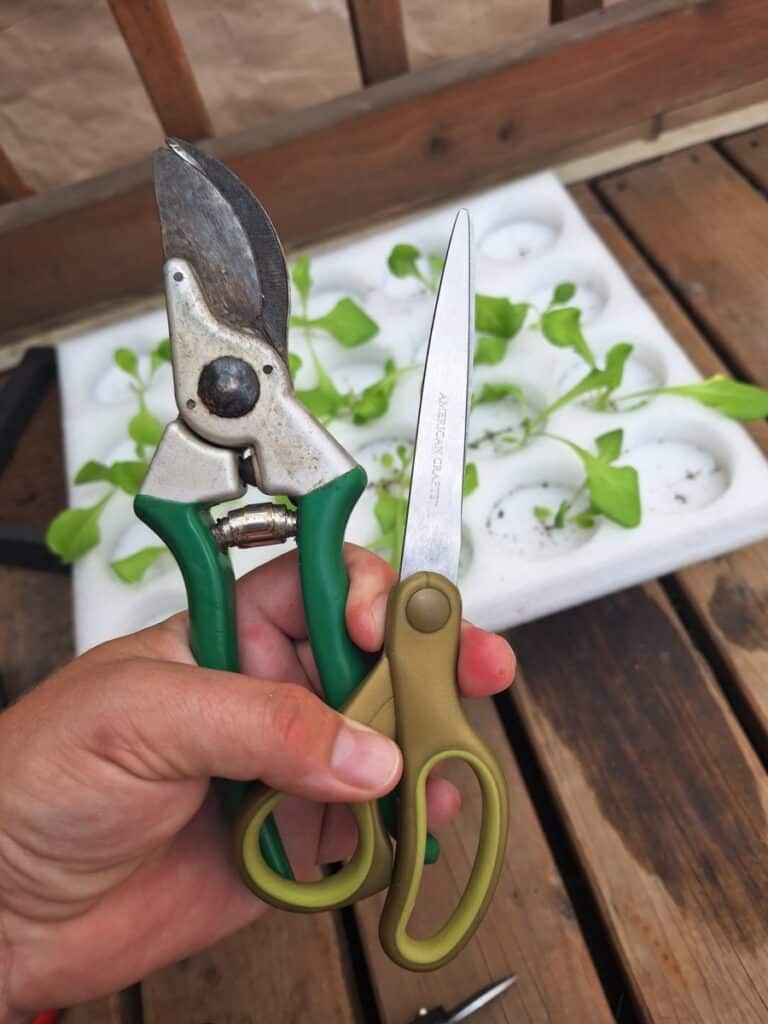
- Prepare your tools: Use sharp scissors or pruning shears to ensure clean cuts without damaging the plant. – follow this affiliate link to the best pruners I bought this season.
- Choose mature stems or leaves: Select the fully developed parts of the herb plant for harvesting. Look for healthy foliage with vibrant color and robust aroma.
- Cut at the right spot: Position your scissors or pruning shears about 6 inches down from the top of the plant and make a clean cut. Leave enough foliage on the plant to allow for continued growth and production of new leaves.
- Harvest regularly: As mentioned earlier, regular harvesting promotes new growth. Keep an eye on your hydroponic herb garden and harvest mature leaves or stems as needed.
4. Cleaning and Preparing Harvested Herbs
After harvesting your hydroponic herbs, it’s essential to clean and prepare them properly to ensure their longevity and quality. Here are the steps to follow:
4.1 Rinsing the Herbs
Start by rinsing your harvested herbs under cool water to remove any possible bugs or dirt. Gently shake off the excess water and pat them dry with a clean towel or paper towel. Properly cleaning your herbs helps maintain their freshness and flavor.
4.2 Removing Unwanted Parts
Inspect the harvested herbs and remove any damaged or discolored leaves or stems. Trim off any parts that appear unhealthy or wilted. This process ensures that only the best-quality herbs are utilized for drying.
4.3 Drying the Herbs
Once your hydroponic herbs are cleaned and trimmed, it’s time to dry them. There are several methods you can choose from, depending on your preferences and available resources. Here are a few popular drying techniques:
4.3.1 Air Drying
Air drying is a traditional and straightforward method that requires minimal equipment. Follow these steps for successful air drying:
- Gather small bunches of herbs and tie them together at the base with a string or a rubber band. Alternatively, you can use a clothes hanger with clips to hang the herbs.
- Find a warm, dry, and well-ventilated area for drying. A dark and cool space is ideal to preserve the herb’s flavor and color.
- Hang the herb bunches upside down in the chosen location. Ensure that the herbs are not overcrowded, allowing sufficient air circulation.
- Leave the herbs to dry for approximately two weeks or until they are completely dry and brittle. The drying time may vary depending on the herb and environmental conditions.
4.3.2 Oven Drying
Oven drying is a quicker method that requires slightly more attention. Follow these steps for oven drying your hydroponic herbs:
- Preheat your oven to the lowest setting.
- Spread the herbs in a single layer on a baking sheet lined with parchment paper.
- Place the baking sheet in the oven and leave the door slightly open to allow moisture to escape.
- Check the herbs every 15 minutes and remove them once they are dry and crispy. Be cautious not to over-dry them, as this can result in a loss of flavor.
4.3.3 Dehydrator Drying
If you have a food dehydrator, this method offers a convenient and controlled environment for drying herbs. Follow these steps for dehydrator drying:
- Place your herbs in a single layer on the dehydrator trays.
- Set the temperature to a low setting, typically between 95°F to 115°F. The optimal temperature may vary depending on the herb and humidity levels.
- Leave the herbs to dry for 1-4 hours, monitoring their progress. Adjust the drying time as needed.
4.3.4 Microwave Drying
Microwave drying is a quick and efficient method for small batches of herbs. Follow these steps for microwave drying:
- Arrange your herbs in a single layer on a microwave-safe plate.
- Microwave on high for 1-2 minutes, checking every 30 seconds to prevent scorching.
- Once the herbs are dry, remove them from the microwave and let them cool before storing.
5. Storing Dried Herbs
Proper storage is essential to preserve the flavor and aroma of your dried hydroponic herbs. Here are some guidelines for storing your dried herbs:
5.1 Choosing the Right Containers
Select airtight containers for storing your dried herbs. Glass jars or plastic bags with zip-lock seals are common options. These containers help prevent moisture and air from reaching the herbs, ensuring their longevity.
5.2 Labeling and Dating
To avoid confusion, label each container with the herb name and the date of drying. This information helps you keep track of the herb’s freshness and allows you to rotate your herb stock accordingly.
5.3 Preferred Storage Conditions
Store your dried herbs in a cool, dry place away from direct sunlight. Excessive exposure to light, heat, or humidity can degrade the herbs’ quality. A pantry or cupboard is an ideal location for long-term herb storage.
6. Additional Tips for Harvesting and Drying Hydroponic Herbs
To further enhance your herb harvesting and drying experience, consider the following additional tips:
6.1 Experiment with Herb Blends
Once you have successfully dried your hydroponic herbs, you can create custom herb blends to enhance your culinary creations. Experiment with different combinations to find your favorite flavor profiles.
6.2 Crushing or Grinding Herbs
When you are ready to use your dried herbs, consider crushing or grinding them to release their flavors. This can be done using a mortar and pestle or a spice grinder. Freshly ground herbs offer a more intense flavor.
6.3 Herb Infused Oils and Vinegars
You can also use your dried herbs to create herb-infused oils and vinegars. Simply place the herbs in a bottle, fill it with your choice of oil or vinegar, and let it steep for a few weeks. This adds a delightful twist to your cooking.
Conclusion
Harvesting hydroponic herbs is a rewarding experience that allows you to enjoy the flavors and aromas of your favorite herbs year-round. By understanding the best time to harvest, selecting the right herbs for drying, and employing proper techniques for cleaning and drying, you can preserve the quality and freshness of your hydroponic herbs. With the various drying methods available, such as air drying, oven drying, dehydrator drying, and microwave drying, you can choose the most convenient approach for your needs. Remember to store your dried herbs properly to maintain their flavor and aroma. So roll up your sleeves, get ready to harvest, dry, and savor the delights of your hydroponic herb garden!